Football Crop Art
INTRODUCTION
The Minnesota State Fair was cancelled this year because of the COVID-19 outbreak. This was kind of a big deal for my family. It’s a tradition for us to attend the fair every year. And it’s not just our family. The Minnesota State Fair is known as “The Great Minnesota Get-Together” for good reason. It’s the largest state fair in the U.S. by average daily attendance.
Part of the fair’s allure is its quirkiness. For example, every year the winner of the Minnesota Dairy Princess Program – the so-called Princess Kay of the Milky Way – gets to have a sculpture of her head carved out of a 90-pound block of butter. Another example is crop art. Crop art at the Minnesota State Fair is when an artist creates a mosaic-like work of art using only seeds and panicles from plants that can be grown in Minnesota. It’s a spectacle to see all the diverse and contrasting images on display.
So, when the fair was cancelled, a huge void was left to be filled. That’s when my daughter stepped in. “Why not have our own fair?” she asked. And so, we did. After weeks of planning, a date was set aside for our own Mini Minnesota State Fair. We enjoyed milk shakes, hot out of the oven Sweet Martha’s cookies, pork chops on a stick, Minneapple pies, deep fried Twinkies, mini donuts, funnel cakes…you name it!
And what was my contribution to the fair? I tried my hand at crop art!
HOW THE HELL DO YOU CREATE CROP ART?
I had no idea how to make crop art, but how hard could it be? I didn’t even bother searching for help online. I figured I’d just glue seed to some sort of sturdy mounting board. It was all the other questions I needed to sort out: What design to use, whether to utilize a picture frame, what kinds of seed to incorporate, etc.
From the get-go, I decided that I’d find a cheap-ass frame and glue the seeds directly inside the frame to some sort of thick illustration board. For glue I’d use the ubiquitous Elmer’s Glue-All. All systems go!
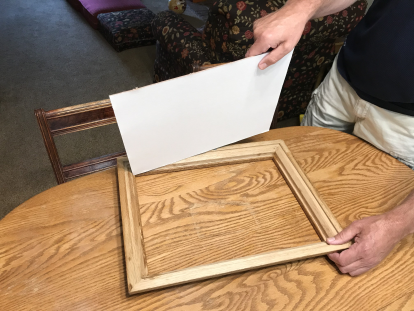
THE FRAME
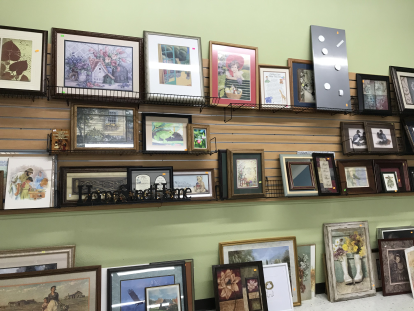
There were lots of frame choices at the thrift store
I determined that the best place to scrounge up a picture frame was a thrift store. My top priority was to spend as little money as possible yet find something acceptable for use. Luckily the thrift store I stopped at had frames up the wazoo. One sizable section of the store consisted of frames only; another big area had (debatable) works of art mounted in frames. I settled on a faded, mass-produced picture of some flowers in a whiskey barrel pot, not for the picture, of course, but for the well-made, attractive oak frame. The item was marked at only $3. Even better, I discovered that it was “25% Discount Day” at the checkout, so I took the frame home for a miserly $2.25.
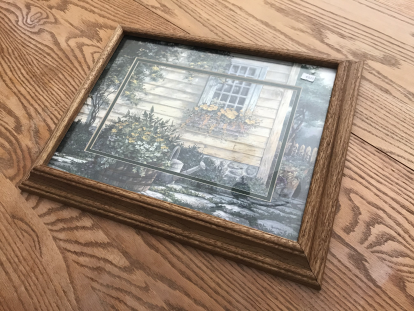
I settled on a faded, mass-produced picture
Once the frame was home, I tore into it with a pliers.
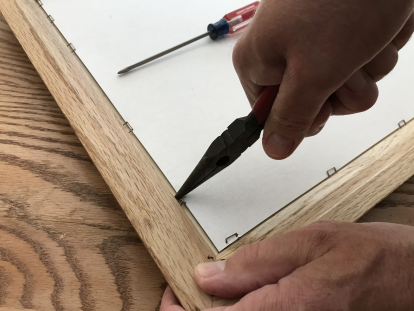
Tearing into the frame with a pair of pliers
I removed the heavy-duty staples from the backing board to expose the guts. It was a proper setup. Inside was a pane of glass, a mat board, a mounting board, and the picture itself.
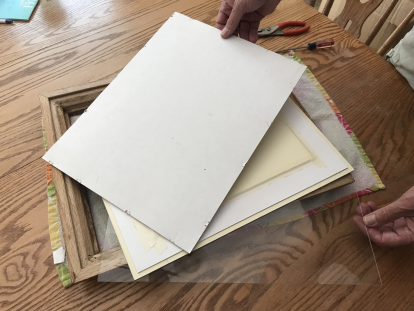
The frame guts
The first thing I did was discard it all except for the frame and backing board. The backing board turned out to be perfect for this project – thick and sturdy. When the time came to start gluing the seeds, I’d glue them directly to the backing board.
I retained only the backing board
CHOOSING A DESIGN
I didn’t spend too much time picking a design. My goal was simply to come up with a presentable, easy to create, piece of art for our little family fair. I grew up on a farm, so I initially considered a silhouette of a vintage tractor chugging away against the backdrop of a sunset. I eventually realized, however, that if I chose a football motif, I’d be able to use it in my blog as well – two birds with one stone. Further, a football logo would be a good choice because of a logo’s inherit simple design. Since I’m a loyal (but battered) Vikings fan, my crop art would be a rendition of the Minnesota Vikings logo.
A quick Google search resulted in a plethora of Vikings logos. I scrolled through the images until I found one in simple black & white. Ignoring any thought of copyright infringement, I copied and pasted the logo into Microsoft Word. Using the tools in Word, I enlarged the image to fill an 8-1/2” x 11” sheet of paper – the largest paper my printer handles – and printed a hardcopy.
SELECTING SEED
I’m an avid bird feeder, so I’m constantly filling feeders with sunflower seed to keep my birds the plumpest in the neighborhood. It struck me right away that those black sunflower seeds would be ideal for the dark spaces and lines of my pending artwork.
White popcorn kernels seemed a perfect fit for the horns of the Vikings battle helmet. Even the sheen of white popcorn is like that of horns.
I wasn’t sure what seed to use for the rest of the project, so I stopped at my local wild bird supply store to browse. The place I frequent has a plethora of seeds available for purchase in bulk. With the colors of the Vikings logo in mind, I looked over what they had. I chose bright yellow field corn for the gold, white millet for the testosterone-filled Norseman’s face, and safflower kernels for the background. It would’ve been cool to scrounge up some purple seeds, but apparently nature uses that color in moderation. I used black sunflower seed for the purple instead.
I ended up way overestimating the amount of seed I would need, but my checkout charge was still a modest $5.28, including tax. And the surplus seed didn’t really go to waste. My wild birds just became that much portlier.
GRID LINES
The last step I did before gluing on the seeds was to sketch the Vikings logo on the backing board. That way I’d know exactly where to glue each seed. This is easier than it sounds if you use “The Grid Method”. Art-Is-Fun.com provides a wonderful explanation of the process, but in a nutshell, this is what I did.
I started by drawing a grid pattern of ½” squares on the Vikings logo that I’d printed earlier.
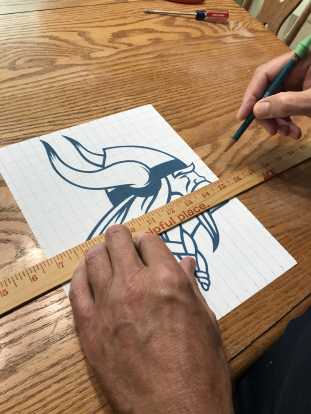
Sketching ½” squares on the printed logo
I did the same thing on the backing board, but this time I made the squares ¾”. By using ¾” squares the design on the backing board would be exactly 50% larger than the logo on the paper. That way the logo would be enlarged to fill as much of the space inside the oak frame as possible.
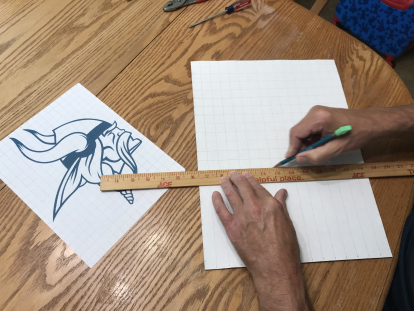
Sketching ¾” squares on the backing board
Using the Grid Method, rather than trying to draw the entire logo onto the backing board en masse, I referenced what I saw on the paper and sketched what I saw in each little square, one square at a time. To help avoid mistakes, and to make it easier to cross-reference the specific square I was drawing at the time, I lettered and numbered the grid of squares basically like an Excel spreadsheet – marking letters ‘A’ through ‘P’ horizontally across the grid, and numbers ‘1’ through ‘22’ vertically. I purposely kept my markings light to prevent pencil lines from showing between any potential gaps in the seeds.
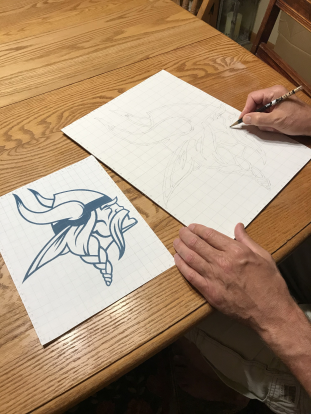
Transferring the logo to the backing board by sketching one square at a time
Once the sketch was done, I stapled the marked-up backing board to the frame with a staple gun.
GLUING THE SEEDS
Finally, I was ready to start gluing. I began with the sunflower seeds to create the black lines and areas of the design. I laid down about an 1/8” bead of glue, maybe 2” to 3” long, and carefully placed the seeds on the wet adhesive until the line of glue was covered with seed. Then another bead of glue was applied and the process of placing one seed at a time was continued. When it was necessary to fill in open areas, each seed was placed in a manner to keep the gaps between the seeds at a minimum.
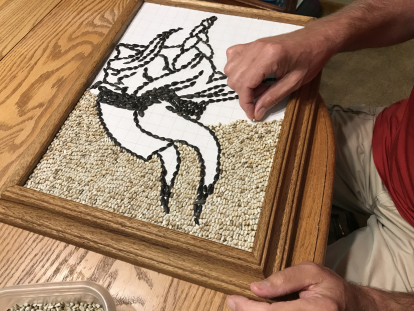
Starting to glue the seeds
Next, I did the background using safflower kernels. I employed the same basic process as I used on the sunflower seeds. I also tried to orient the kernels so that the tips always pointed towards the bottom of the frame – within reason – but minimizing gaps between the seeds was always my overriding priority. I did the same with the field corn and popcorn.
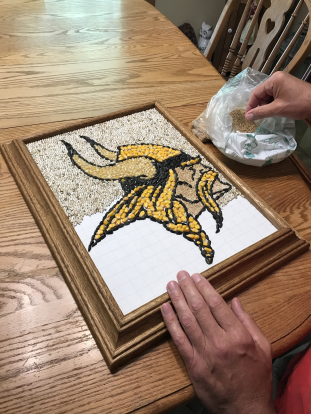
The project is progressing nicely
The only seed left to add was the millet. I was dreading the millet! Since it’s by far the smallest seed that I would use, I assumed it would be the most time consuming to glue. I was mistaken. Because millet is spherical, I found I didn’t have to worry so much about its placement. I simply applied about a half inch square of glue, dropped in a pinch of a dozen or so millet seeds, and then pushed them snugly into place using the tip of a pencil. The process was rewardingly fast.
Please know that the term “fast” is relative. I don’t think you would find it hard to believe that gluing a bunch of tiny seeds to card stock is, on a whole, quite time consuming. In fact, by my calculations, the process of gluing on the seeds took a total of about 13 hours. Yet, surprisingly, it wasn’t boring. Instead it was wholly relaxing and rewarding. And it’s a great activity to combine with TV, podcasts, or audiobooks.
PRESERVING THE ARTWORK
Before calling the project complete, I sealed the work with a protective coating. This was done with three light coats from a rattle can of Varathane clear gloss polyurethane. I covered not only the seeds, but also the frame.
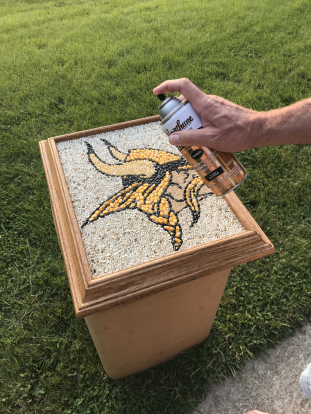
Preserving the artwork
Except for my time, the polyurethane was the most expensive part of this project. Including tax, it cost a little over $8 – but I’ll be recouping 88¢ when the 11% Menards mail-in rebate arrives in my mailbox. It’s money well spent. The polyurethane adds a warm, golden glow and will protect the project for years to come.
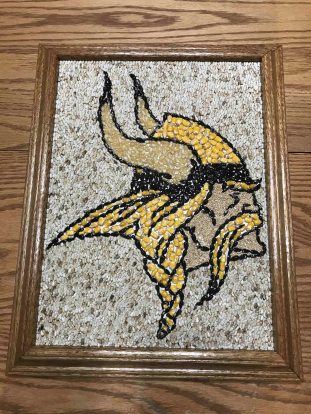
RESULT
I’m very pleased with the results of this project. What began as a token effort to contribute to my family’s miniature State Fair event resulted in an enjoyable-to-make little work of art. The entire process was stress reducing and gratifying, all for an investment of around 15 bucks. And it’s not every day you see a proud Scandinavian pirate depicted with corn, sunflower seeds, and millet.
Why not create your own football crop art masterpiece? It’s easier than you think. It’s not grain surgery!
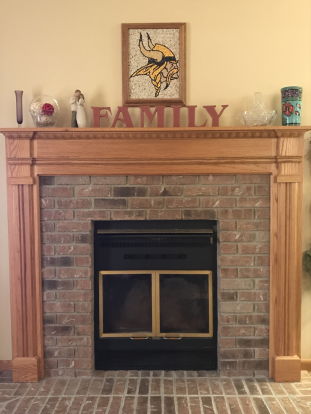
A temporary home above the fireplace mantle. As nice as it looks, the project now resides in my man cave by order of the wife, who clearly does not appreciate fine art!